
Vending Machine Inside: Placement Specs and Safety Rules

U.S. vending-machine-operator sales reached $9.616 billion in 2024, up from $6.419 billion in 2020, in U.S. Census Bureau data reported by the Federal Reserve Bank of St. Louis. That recovery didn't come from a few flagship stores. It came from thousands of individual cabinets in break rooms, schools, hospitals, factories, and lobbies, each one only as good as its placement, power, temperature control, and restocking routine.
That's why putting a vending machine inside your building isn't a furniture decision. It's a food-safety and accessibility decision that happens to involve floor space. Get the clearance wrong and a wheelchair user can't use it. Get the circuit wrong and you lose the cold chain. Get the interior layout wrong and you pay for refunds, crushed packs, and stock counts that don't match what's in the lanes.
Indoor Vending Specs and Clearances at a Glance
An indoor vending machine is a heavy, powered, temperature-controlled cabinet. Its placement is set by clearances, power, and food-safety limits before anyone talks about snacks or convenience. If the room can't meet the numbers below, the spot isn't viable, no matter how good the foot traffic looks.
Use this table as your first pass. Measure the actual room, then check each value against the model spec sheet before you set a delivery date.
Requirement | Standard value | Why it matters |
|---|---|---|
Front clear floor space | 30 by 48 inches (760 by 1220 mm) | Lets a wheelchair user approach the machine |
Accessible route width | At least 36 inches wide | Keeps the aisle usable for wheelchairs |
Operable keypad, coin and card reader height | 15 to 48 inches above the floor | Sets the forward reach range |
Ambient air inside refrigerated cabinet | 5°C (41°F) or below | FDA Food Code limit for refrigerated vending |
Post-restock allowance | Up to 30 minutes above 5°C (41°F) | Covers the time after filling or servicing |
Power supply | Dedicated outlet matched to nameplate amperage | Prevents tripped breakers and cold-chain failure |
Cabinet footprint | Width, depth and door swing recorded from the model spec sheet | Measure width, depth and door swing before delivery |
How to Read These Numbers
The clearance figures protect access, not just fit. A cabinet can physically squeeze into an alcove and still fail because there's no 30 by 48 inch clear space in front of it, or because the route narrows below 36 inches once the door swings open.
The temperature figures are legal limits, not preferences. A refrigerated cabinet that runs warm isn't a minor quality issue. It's a compliance failure that should stop the machine from vending until it's corrected.
Practical rule: If you can't verify the outlet, the route, and the door swing on paper, don't schedule delivery. You'll discover the same problems on the day, with a cabinet blocking the hallway.
Power deserves the same discipline. Match the outlet and circuit to the nameplate amperage on the specific model, whether that's a compact refreshment center or a larger dual-zone unit. Shared circuits with microwaves, space heaters, or cleaning equipment are a common cause of nuisance trips, and every trip puts chilled product at risk.
Check the table against the room and the spec sheet together. One without the other gives you false confidence.
How to Choose a Spot Inside Your Building
The best indoor spot usually isn't the most visible corner. It's the spot with steady, predictable traffic where power and the accessible route already work. I would start with the location people already pass on breaks, then test it against the specs.
This process view shows the order I recommend working through before you commit to a wall.
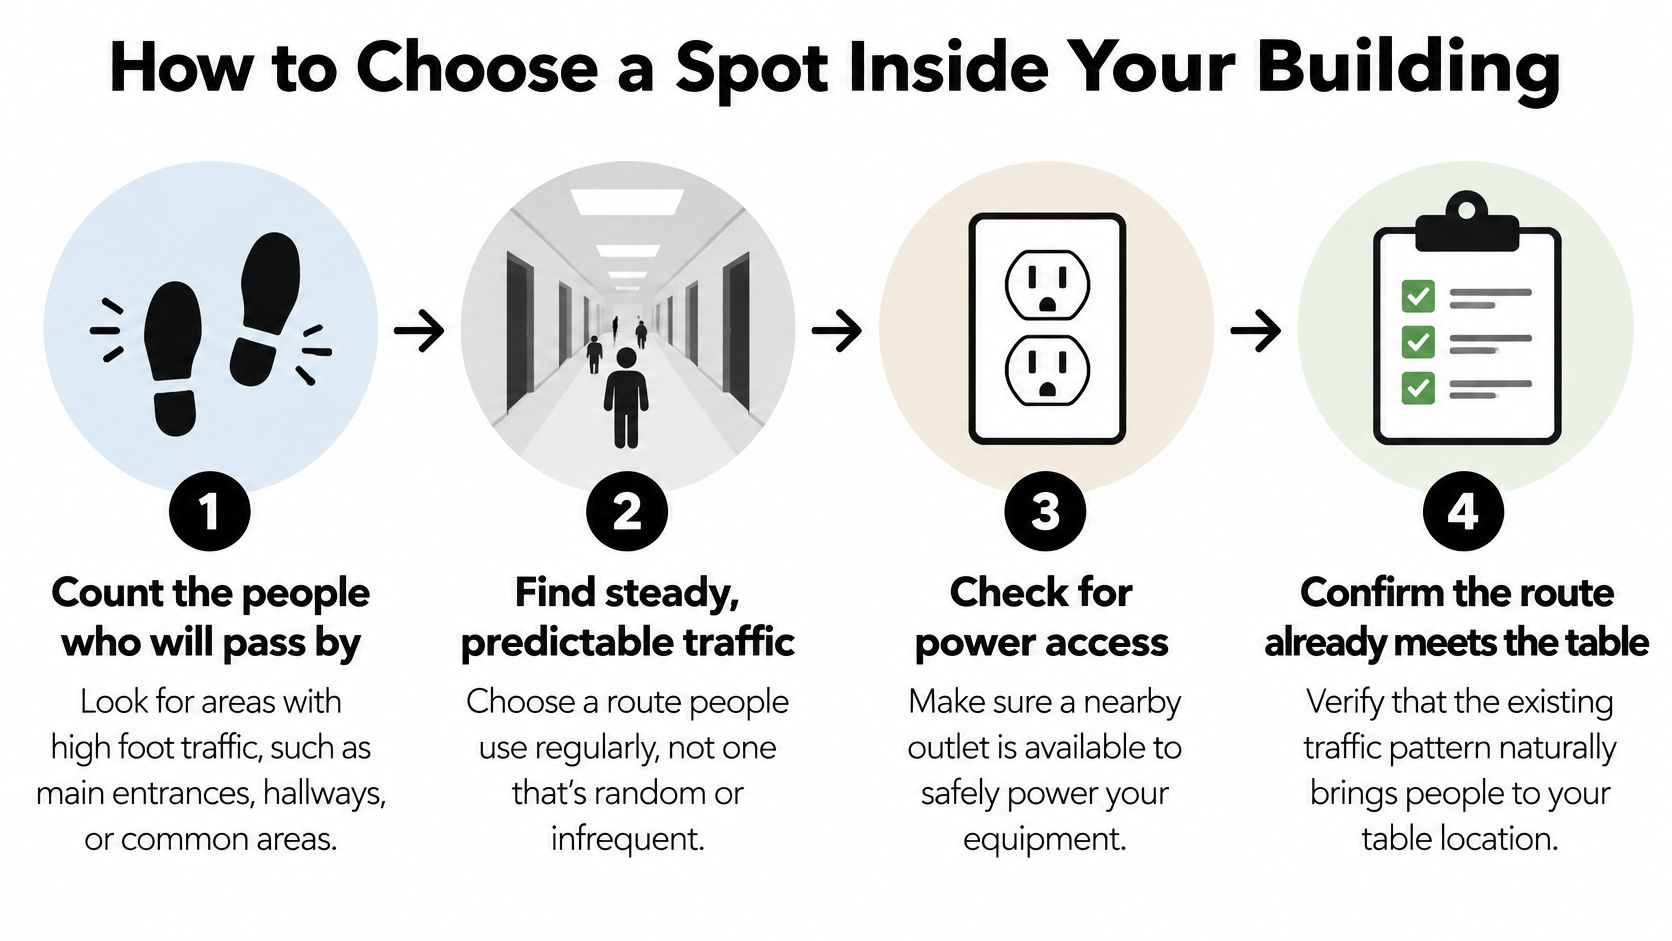
Work Through the Spot in Order
Count the daily users: Confirm the machine sits on a route people already walk, such as between workstations and a break room, not down a dead-end corridor. A common mistake is chasing a busy lobby where people pass quickly but never stop.
Measure the approach: Check the front clear space and the full accessible route, including doors, corners, and turning space. Don't measure only the wall where the cabinet will stand.
Confirm dedicated power: Check the nameplate amperage against the circuit with your facility team. Extension cords and power strips aren't a substitute for a proper outlet.
Avoid heat sources: Keep the cabinet away from heaters, direct sunlight, and vents that blow warm air onto it, because they raise ambient temperature and make the compressor work harder. A window that heats up every afternoon can turn a good spot into a temperature problem.
Check the floor: The surface needs to be level so the cabinet sits stable and the door seal closes properly. A rocking cabinet wears hinges unevenly and can leave a gap in the seal.
Confirm sightlines and lighting: Choose a spot visible from a staffed area or camera, with enough light to read labels and payment prompts. Dark, isolated corners invite misuse and make faults harder to spot.
Get written approval: Have the building or facility manager sign off on access, operating hours, and service-door clearance. Verbal permission falls apart when a new manager asks why a cabinet is blocking a service route.
Good location planning also covers delivery and servicing, not just daily use. Our guide to planning a venue set-up for vending is worth reviewing alongside your measurements, especially for door widths and service access.
A good location looks unremarkable when it's done right. There's a clear route, a stable floor, a dedicated outlet, and an approved service path. Nothing is improvised.
Keeping Refrigerated Zones Within Food-Safety Limits
Cooling isn't the same as control. A compressor can run all day while a blocked vent creates a warm pocket around chilled meals. That's why a refrigerated vending machine inside a workplace needs verified temperature control, not just cold air.
A temperature check during servicing shows what verification looks like in practice.
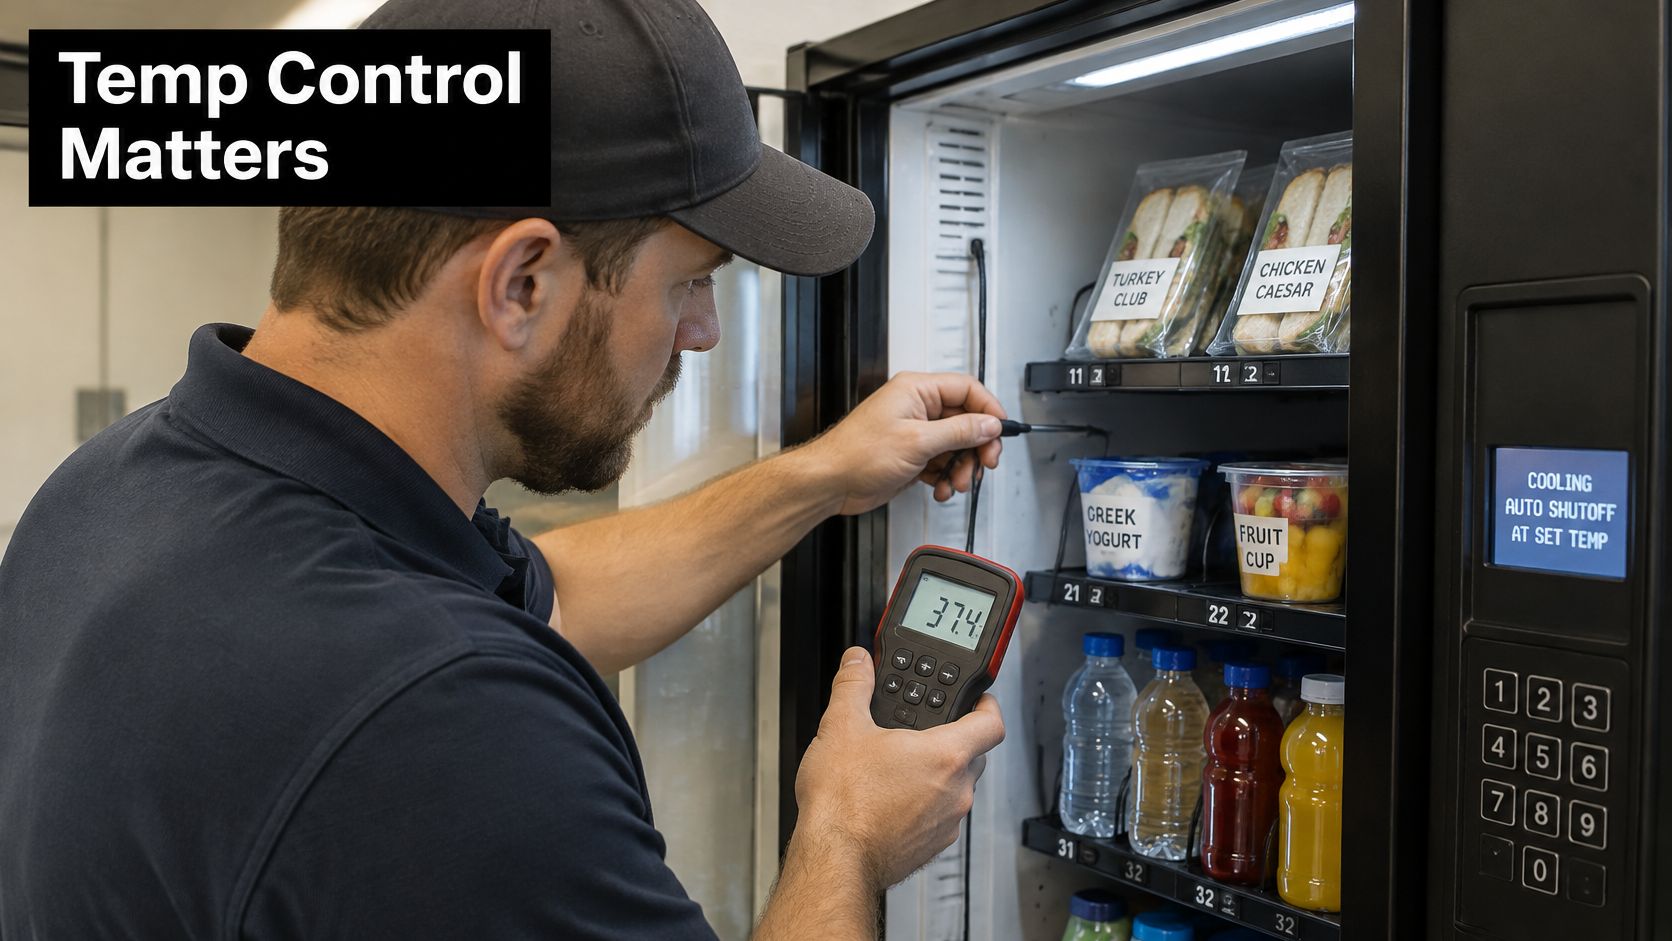
The FDA Food Code requires refrigerated vending-machine ambient air to remain at or below 5°C (41°F), with an allowance of no more than 30 minutes above that threshold immediately after filling, servicing, or restocking. For time and temperature-control-for-safety foods, the machine must also use an automatic control that prevents vending after a power failure, mechanical failure, or other condition prevents it from maintaining required food temperatures.
That second requirement matters as much as the temperature limit. A machine that keeps selling after a failure is worse than one that stops. The automatic vend-inhibit state protects the customer and gives the operator a clear signal to inspect and restock properly.
Zone | Target temperature | Monitoring |
|---|---|---|
Chilled drinks and meals | 5°C (41°F) or below | Sensor per zone with telemetry alert |
Frozen products | Held solidly frozen at the manufacturer's frozen setpoint | Separate sensor with vend inhibit on failure |
Ambient snacks | Room temperature, away from evaporator and heat | Cabinet check at each restock |
Why Each Zone Needs Its Own Sensor
In a dual-zone chill or frozen configuration, a shared sensor can report an acceptable average while one compartment drifts warm. Each zone needs independent monitoring, with sensing near the warmest product areas, so an excursion in one compartment isn't masked by the other.
Loading technique affects readings too. Minimize door-open time during restocking and don't block evaporator airflow with overfilled lanes. Otherwise you'll create localized warm spots even when the cabinet sensor looks fine. This is especially relevant for fresh and chilled ranges, and our overview of lunch vending machine options covers how product type changes the cold-chain demands.
This short video walks through temperature control in a working machine.
Commission the Machine Before You Trust It
Run a simple commissioning test at installation. Log temperature during a full restock, through compressor recovery, and during a simulated power interruption. Then verify the machine rejects affected products until it's inspected and restocked in compliance.
Any temperature alert should open a service ticket with a named owner. A log entry nobody reads doesn't protect anyone.
Layout and Packaging That Prevent Misvends
Most indoor vending complaints start inside the cabinet. A crushed seal, a leaning can, or a product that drops badly creates a refund, a jam, or a stock count that's wrong for the rest of the week.
Food sold through a vending machine must remain in the package in which it was placed at the food establishment or processing plant, according to the FDA Food Code. That means shelves, spirals, trays, and guides have to support packaged items without crushing seals, puncturing flexible packaging, or causing leakage during delivery.
This checklist view summarizes the interior conditions that keep dispensing consistent.
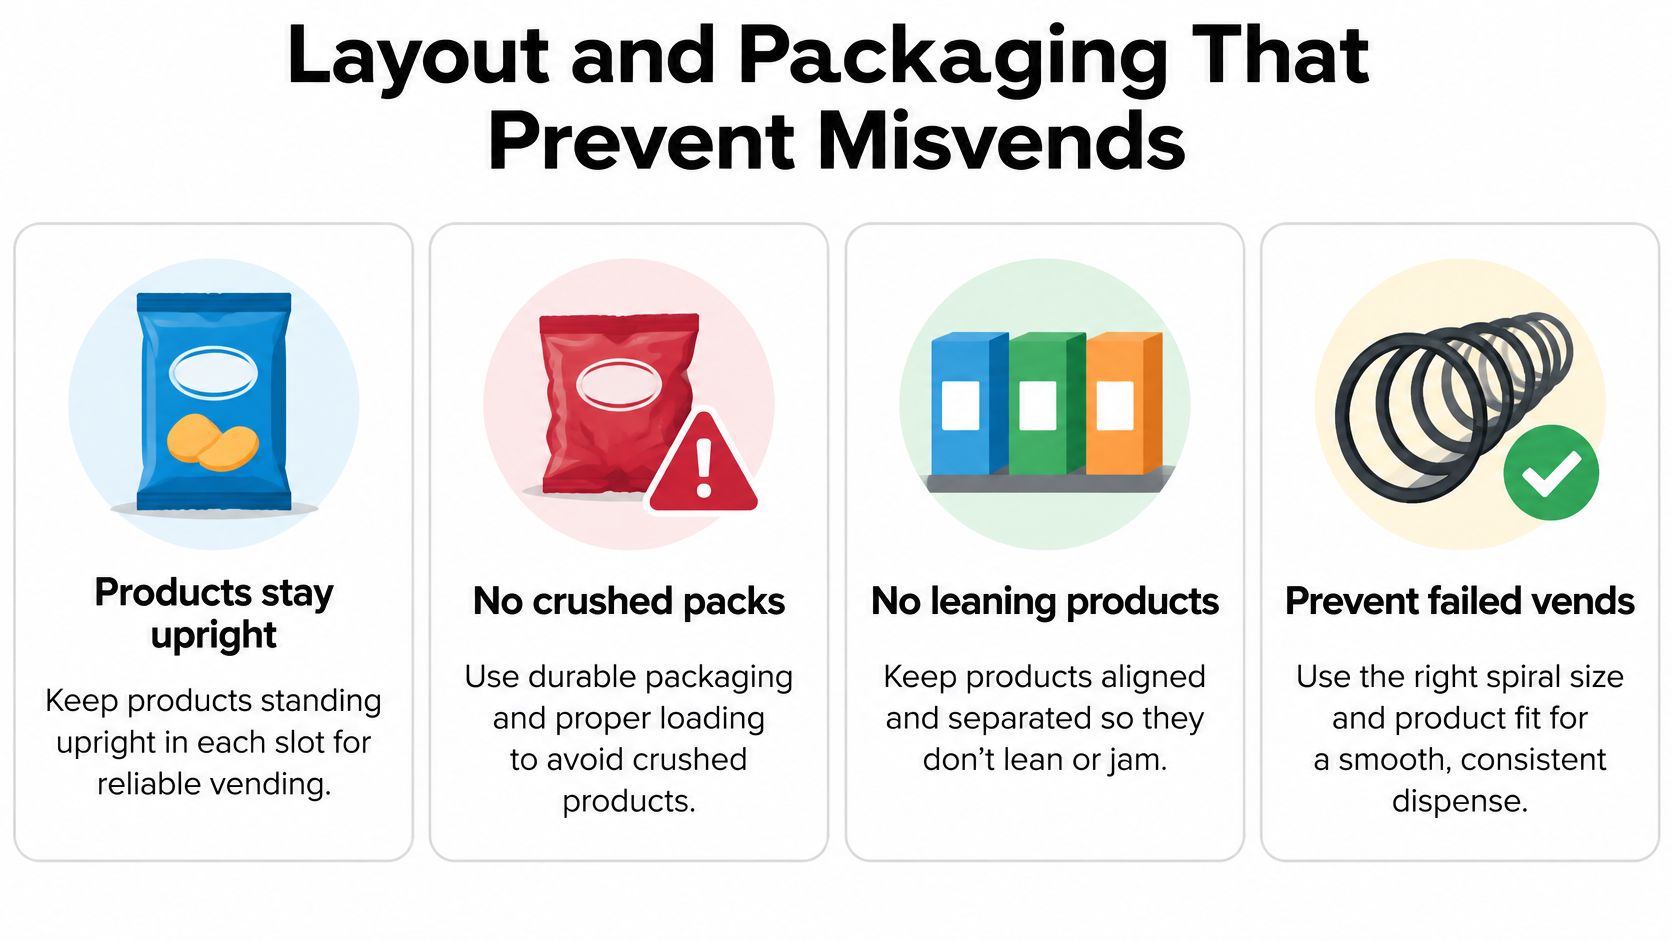
Set Up Each Lane to Prevent a Specific Failure
Assign a fixed lane and facing: Each SKU occupies a defined position, so the planogram, the label, and the telemetry all describe the same product. Loose placement creates silent inventory errors.
Use stable dividers: Dividers stop products leaning into neighbouring lanes, where they can jam a spiral or trigger a failed vend detection.
Match drop height to fragility: Fragile refrigerated meals and beverages may need a short-drop mechanism, cushioned landing surface, or elevator-style delivery. A long fall that a candy bar survives can split a chilled meal tray.
Respect spiral and shelf ratings: Overweight items strain motors and stall mid-vend. If a product needs two hands to lift comfortably, check the lane rating before you stock it.
Verify every vend: Reconcile product identity, lane assignment, and motor telemetry after each sale, so a failed delivery triggers an automatic refund or service exception instead of disappearing into the count.
Choose cleanable surfaces: Interior materials should be smooth, corrosion-resistant, and easy to clean, especially where condensation collects around chilled or frozen products.
A well-set-up interior looks finished on day one. Every lane is labelled, every drop is tested, and every failed vend is logged. If you skip the test vends, your customers will run them for you.
Accessibility and Security for Shared Indoor Spaces
A machine in a break room, lobby, or school corridor serves people with different abilities, and it sits unattended for most of the day. Accessibility and security aren't separate checklists. A spot that's hard to reach is often also a spot that's hard to supervise.
Keep the Approach Usable at Peak Hours
Operable parts such as keypads, coin slots, and card readers need to sit within the forward reach range, with a clear approach in front of the machine. That approach has to stay clear at peak hours, not just when the building is quiet. Queueing staff, stored chairs, or a recycling bin can erase the clear space you measured during installation.
Hallway placements need extra care. A cabinet plus its door swing can narrow a walkway enough to block a wheelchair, even if the corridor looked wide when empty. Measure the route with the cabinet in place and the service door open, because that's the condition your users and your restocking staff will meet.
Control Tipping, Sightlines, and Keys
Three controls cover most indoor security risk:
Anchor or brace the cabinet: A tall, heavy machine must not tip if someone leans on it or rocks it after a failed vend.
Use natural surveillance: Place the machine where a staffed desk or camera has a clear line of sight. Facility teams who want the underlying principles can apply CPTED principles to commercial properties from Overton Security, which treats visibility and layout as preventive controls rather than afterthoughts.
Control the keys: Keep the service door locked, with keys held by a named person and a record of who has copies.
Cashless payment reduces cash theft risk, since there's less money in the cabinet. It doesn't remove the need for lighting, a sound lock, and a clear tamper-report contact posted where users can find it. Our rundown of vending machine security features covers the hardware side in more detail.
Sign-off check: Name who approves the accessible route, who holds the keys, and who takes the tamper report. If any of those answers is "whoever's around," the placement isn't finished.
Restocking and Staffing Routines That Keep Machines Stocked
An indoor machine is an operating routine, not just equipment. The cabinet can meet every spec and still disappoint people if the top sellers run out on Wednesday and nobody notices until Monday. Restocking should follow actual sales per location, not a fixed guess copied from another site.
Connect Each Task to the Signal That Triggers It
The telemetry layer reports sales, low inventory, faults, and machine status. Set low-stock and fault alerts to go to a named person, not a shared inbox nobody owns. An alert without an owner is just a record of a problem you chose to watch.
The people layer turns alerts into visits. Name who restocks, who checks temperature logs, who cleans the exterior and interior, and who answers a customer complaint. Connected systems improve replenishment planning, but they don't replace route drivers or technicians, so every alert needs a physical visit and a closed ticket.
The planning layer sets cadence. Use sales data from that specific location to decide visit frequency, keep a small reserve of proven sellers, and review waste each month. Our explanation of why inventory management is important in vending shows how those reviews change what gets stocked.
A Common Break Room Pattern
Say a break room machine sells out of its top three drinks by mid-week, while two slow snack lanes sit full until they expire. The fix usually isn't a bigger machine. It's rebalancing the lanes, giving the proven sellers more facings, cutting the slow lines, and moving the restock visit earlier in the week.
That rebalance only happens if someone reviews the data. Monthly, look at four things together:
Sales by lane: Which products earn their space, and which ones are filling it out of habit?
Waste and expiries: Repeated waste in one category means the assortment or the par level is wrong for that site.
Temperature alerts: Recurring alerts at the same time of day point to a loading, airflow, or heat-source problem, not bad luck.
Complaints and refunds: Repeated failed vends on one lane point to packaging, weight, or divider problems you can fix mechanically.
We customize each machine's inventory to fit the needs of the space where it's placed, and that customization only works if the monthly review feeds back into the planogram. A routine that never changes the assortment isn't data-driven. It's just scheduled.
Confirm Placement Before You Sign a Vending Agreement
A machine can meet its specifications and still create food-safety or access problems if the actual room does not. Before signing, confirm the route, operating space, power, refrigerated-zone controls, and who is responsible for routine tasks. Put unresolved items in writing rather than assuming they will be handled after installation.
Use this final checklist:
Measurements confirmed: Check the delivery route, available clearance, and cabinet door swing against the machine specifications in the actual room. A tight route or blocked door can prevent installation or make daily access difficult.
Power approved: Have the facility team confirm that the outlet and circuit suit the machine's nameplate amperage. An unsuitable connection can interrupt operation.
Zones monitored separately: Confirm that each refrigerated zone has independent sensing and a vend-inhibit alert connected to a service ticket. Without separate monitoring, a temperature problem in one zone may go unnoticed.
Owners named: Assign restocking, cleaning, temperature logs, and key control to specific people. Unassigned tasks are easily missed.
Escalation written down: Record service response expectations and fault escalation in the agreement, and require alerts to be tracked through resolution.
Ask every operator the same questions in writing: who restocks, how stockouts and faults are handled, and what telemetry data is shared. Review the vending machine rental agreement terms to check that responsibilities are clear.
Vendmoore offers full-service vending, handling stocking, service, and support in Oklahoma City, Norman, Moore, Del City, and the surrounding Oklahoma metro area. Call 405-294-2373 to discuss service for your location. For an office, school, healthcare site, or industrial break room in the Oklahoma City metro, visit Vendmoore Enterprises to review the service area and get in touch.
Comments